A good laundry room is designed around one loop: dirty clothes arrive, get sorted, go in, come out, get dried, get folded, and leave. Every design decision that shortens that loop or gives each step a surface makes the room better. Every decision that looks nice but adds a step — a basket you have to move to open the dryer, a shelf too high to reach with a full load — makes it worse, no matter how good it photographs. The laundry room design ideas below start from that loop and work outward to storage, finishes and budget.
Start with the machines, then measure the gaps
The washer and dryer decide everything else, so place them first.
- Front-loaders side by side need 120–130 cm of width, 65–70 cm of depth, and at least 100 cm of clear floor in front so the doors can open while you stand there with a basket.
- A stacked pair needs about 60–70 cm of width and roughly 180–200 cm of height with a stacking kit. It is the right answer in most apartments and in any room narrower than 130 cm.
- A washer-dryer combo fits in 60 cm and suits a studio or a kitchen niche, but dries roughly half a wash load at a time and takes 3–5 hours for a full cycle. Plan for a drying rail as well.
Leave 3–5 cm either side of each machine and 10 cm behind for hoses and the vent or condensate line. Machines pushed tight against walls transmit vibration into the wall and make the whole room hum during the spin cycle.
Measure the doorway too. A standard washer is 60 cm wide; a 70 cm door with a frame in it is tighter than it sounds, and more than one laundry makeover has ended with the new machine on the hallway floor.
Layouts by room size
A cupboard or niche (under 2 m²)
Stack the machines, put a single deep shelf above them for detergent, and hang a fold-down rail or a retractable line on the side wall. Bifold or pocket doors beat a hinged door here, because a hinged door needs its own swing space in front of a cupboard that is already short of it. A 20 cm-deep slim cabinet on the free side holds an ironing board, a mop and a vacuum upright.
A narrow galley (2–4 m²)
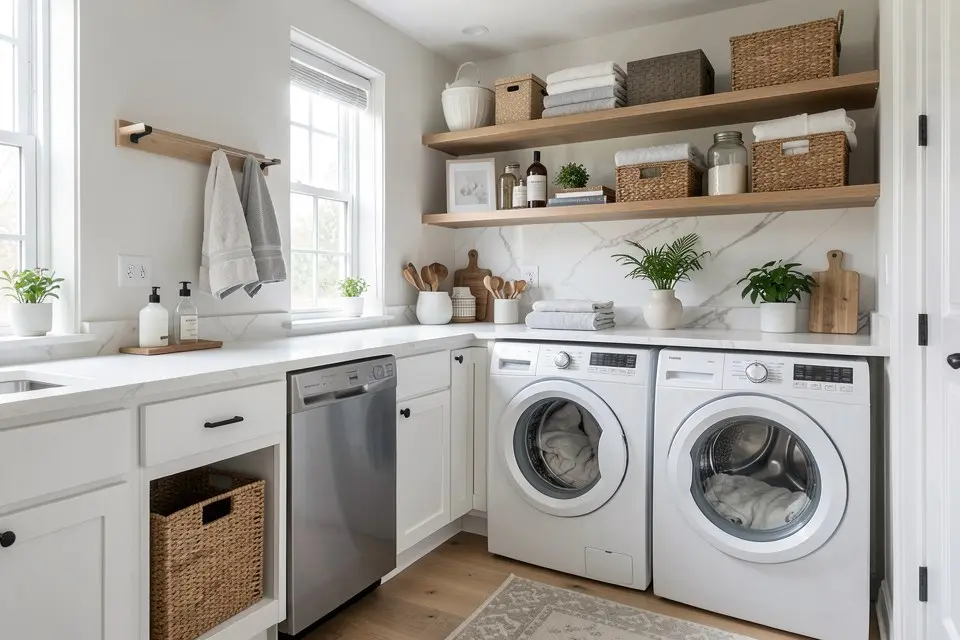
Machines on one wall, everything else on the opposite wall, with at least 90 cm between. If the machines are side by side, a 60 cm-deep worktop across both is the single most useful thing you can add to a laundry room: it becomes the folding table, the sorting station and the place you put things down. Put two or three wall cabinets above it at 50–55 cm clearance, so you can still see and use the counter.
A dedicated room (4 m² and up)
Now you can have zones: sorting (three bins or a pull-out hamper unit), washing, drying (a ceiling airer or a rail over a tiled area) and folding. A utility sink earns its space here for hand-washing, soaking and muddy boots. Place it next to the machines so it shares the existing supply and drain; a sink on the far wall can double the plumbing cost.
In any size, the order along the wall should follow the loop — hamper, machines, counter, rail — so clothes travel in one direction instead of zig-zagging.
Storage that fits the job
Laundry storage is small, heavy and wet, which rules out a lot of what works elsewhere.
- Open shelves are good for the things you reach for every wash: detergent, softener, stain spray. Keep them at 140–170 cm so nothing is above eye level.
- Closed cabinets hide the ugly things: spare bulbs, cleaning products, the second iron nobody uses. Doors also keep dust and lint off stored linen.
- Pull-out hamper units under a counter replace the pile on the floor. Two or three bins labelled whites, darks and delicates end the pre-wash sort entirely.
- A hanging rail for shirts straight out of the dryer saves more ironing than any gadget. 60 cm of rail is enough for a small household.
- Wall hooks and a slim rack on the back of the door hold the ironing board, a lint roller and the mop.
Anything stored above the machines should be in bins you can lift down with one hand. Loose bottles on a high shelf above a vibrating dryer end up on the floor.
Finishes that survive water, heat and lint
A laundry room gets steam, drips, occasional floods and a constant layer of fine lint. Choose finishes for that, not for the showroom.
Floor: porcelain tile or luxury vinyl plank with sealed joints. Both cost roughly €25–€60 per m² in materials. Avoid laminate and solid wood, which swell after the first hose failure. If the room sits above another room, a drip tray under the washer (€20–€40) is cheap insurance.
Walls: a scrubbable paint in eggshell or satin, or a tiled splashback behind the sink and machines to 120 cm. Matt emulsion marks the first time someone leans a wet basket against it.
Counter: laminate or compact laminate on a budget, quartz if the room is visible from the kitchen. Timber works only if it is oiled regularly and kept away from the sink.
Colour: the laundry room is the one room in the house where a strong colour is almost risk-free. It is small, the door is usually closed, and nobody sits in it for an evening. Sage, deep blue-green and terracotta all hide lint better than white. Check the undertone against the flooring first — the undertone method applies here as much as in a living room.
Lighting and ventilation are not optional
Most laundry rooms have one ceiling light, which puts you in your own shadow at the counter and makes it hard to spot a stain. Add an LED strip under the wall cabinets (€30–€80) and pick a neutral 4000 K colour temperature, so a navy sock and a black one look different.
Ventilation matters more. A tumble dryer, wet clothes on a rail and a closed door produce the conditions for mould on the ceiling within a winter. If there is no window, fit an extractor fan on a humidistat (€80–€200 plus an electrician) and leave a 1 cm gap under the door for make-up air. A heat-pump dryer also puts far less moisture into the room than a vented or condenser model, and uses roughly half the electricity.
When the laundry is in the kitchen or bathroom
In many European homes there is no laundry room — there is a washer in the kitchen or the bathroom. The design goal then is to make the machine disappear.
- Kitchen: build the washer into the run with a matching cabinet door on an integrated-door hinge, or leave the front visible and continue the worktop over it. Keep a 60 cm drawer next to it for detergent, and put the drying rack in another room. The kitchen refresh guide covers matching new fronts to old cabinets.
- Bathroom: stack the machines in a tall cabinet with louvred doors, or behind a curtain on a ceiling track (€40–€120). The bathroom redesign ideas include keeping a stacked pair from dominating a small room.
- Hallway cupboard: the most overlooked spot. If there is a supply and drain within 2–3 m, a hallway cupboard can take a stacked pair and free the kitchen entirely.
In a rental, the rules from renter-friendly upgrades apply: freestanding shelving, tension rails and adhesive hooks do most of the work without a drill.
What it costs
Rough 2026 ranges for a typical 3–5 m² laundry room, excluding the machines:
| Level | What it includes | Budget |
|---|---|---|
| Refresh | Paint, two open shelves, rail, hooks, LED strip | €200–€600 |
| Fitted | Worktop over machines, 2–3 wall cabinets, hamper unit, lighting | €600–€2,000 |
| Full remodel | New floor, tiled splashback, utility sink, extractor, cabinetry | €2,500–€7,000 |
| Relocation | Moving supply, drain and electrics to a new room | +€1,500–€4,000 |
The biggest cost jump is always plumbing. If the budget is tight, keep the machines where the pipes already are and spend on the counter and storage instead — that is where most of the day-to-day improvement comes from.
Try the layout before you buy the cabinets
Laundry rooms are small enough that a few centimetres decide whether a door opens. Mark the machine footprints and door swings on the floor with masking tape, then stand there with a full basket. It takes ten minutes and catches most mistakes.
For the look — whether a green wall and oak shelves work with your tiles, or whether open shelving looks too busy — take a straight-on photo of the room and run it through Room Redesign in Homie with a couple of styles. It is a quick way to compare finishes before committing to paint or ordering cabinets, and the same five-step redesign method applies to a laundry as to any other room.
A short checklist
- Place the machines first; confirm 100 cm clear in front and a doorway wide enough.
- Arrange the rest along the loop: hamper, machines, counter, rail.
- Add a worktop if the machines are side by side; add a fold-down surface if stacked.
- Choose a floor that survives a leak and scrubbable wall paint.
- Add task lighting under the cabinets and an extractor if there is no window.
- Spend on storage and surfaces before you spend on moving plumbing.
Get those six right and the laundry room stops being the room you avoid and becomes the one that quietly keeps the rest of the house in order.